-
First of all, pop off the covers for your wheel lug nuts
-
Now comes the challenging part - the spindle nut must be taken off. It's the big 1.25" nut in the middle. You may find it is crushed in at a few points. This makes things more difficult in removing the nut. You might be able to muscle it off with a five foot breaker bar (it's like a normal ratchet wrench with a really long extension). This gives you tremendous torque on the nut. Another thing to try is an impact wrench (I haven't tried this, I went right to cutting the nut off when the breaker bar didn't work. Since this project I've bought an impact driver, and man is it awesome!). Finally, the last ditch thing to do is cut off the nut or use a nut cracker. The nut cracker probably won't work well since you don't have access to the whole nut. I cut the spindle nut mostly off with a dremel cutoff wheel and a set of titanium drill bits. Pick away at two sides of the nut until you have it mostly slotted on both sides, then try using a breaker bar, and the nut will probably pop loose. The slots allow the nut to stretch slightly, which allows it to turn. Also, spray regularly with WD40 and brake parts cleaner to remove corrosion/lub up the nut. I soaked mine over night before success happened the next day. WEAR PROTECTIVE GOGGLES, AND MAYBE A MASK TOO, this dust is toxic and quite an irritant!
-
Next loosen each lug nut (just loosen one turn or so, don't take off)
-
Put up the car ....raising point help.....Remember to use jack stands and a wheel chock any time you go under or near a car that has been raised off a wheel, even if it seems safe. Remember a car weights thousands of pounds, and if it falls on you, that's it. If it falls on a leg or arm, well, that's it for that limb, get it? It is always worth the effort to be safe.
-
Take the wheel off
-
take off the spindle nut
-
remove the cotter pin in the castle nut (looks like a castle) then loosen the castle nut and remove it. Get a new castle nut cotter pin from a standard autoparts store - i.e. Oreilly
-
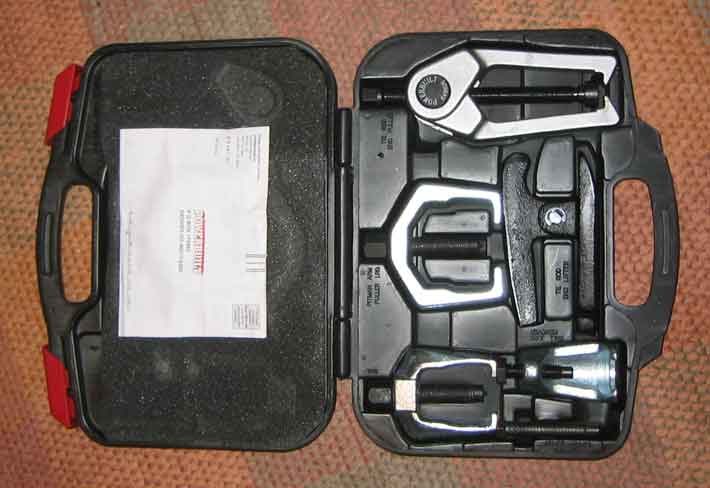
use a puller similar to the one shown in the picture to pop the hub assembly off the lower arm
Use the following rigid arm puller, as opposed to the swivel arm puller |
|
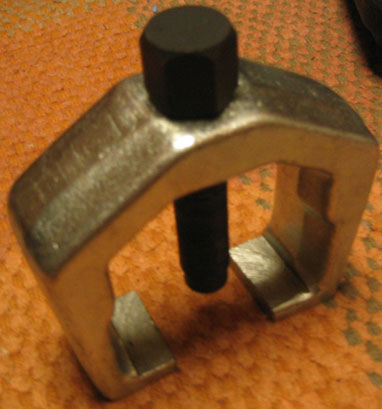 |
- trust me here, use the puller. If you have the right puller it pops off in a matter of minutes (if not seconds) whereas if you don't, it is likely to take all night and you'll break something. Go to Oreilly autoparts, or a similar store. Oreilly lets you check out tools such as puller kits which are normally expensive. Then you can return them after a few days! Cool. Since you only do this job (hopefully) once in a long long while (many years) you don't need the puller all the time. It just takes up space at your house, and gets rusty while it waits
- lift off the hub assembly from the lower arm and slide the cv spindle out of the hub. It should come out pretty easily
- You might want to support the hub or have a second person there to keep the hub from pressing against the cv joint
- Drain the transmission fluid by first attempting to loosen the inspection bolt. It should only be on with 20ft-lbs of torque. Mine was done poorly at some point and was on very tightly. The other option for refilling the transmission oil is to take the second bolt out (shown). You can fill from there if you make some seal against the transmission and use a pump (~$5 from autoparts store) to pump in the transmission fluid.
- once the oil is out, use a large flathead screwdriver or something maybe a bit bigger which has a flat surface to pop the transmission side of the CV joint out of the transmission. Be careful to pull it out straight.
- if you want you can replace the oil seal now by popping it out (it is pretty tight so this can be challenging, as a screwdriver will probably rip the seal). If you get a new one, be sure it matches the old one in diameters. I had problems with this and so went back to the old seal
- get the new or rebuilt CV and now reassemble - first get it generally in place
- place the CV in the transmission, slide it in until the retaining clip resists you
- now get parallel to the wheel, and hold the CV by the outer (wheel) side, and do what is similar to a bench press to push on the CV, when it goes into place it will pop in suddenly, moving around 1/2-1"
- it takes some force, but not huge force.
- slide the hub onto the spindle of the CV after greasing the spindle lightly. it should go right in.
- now it is in, reverse the dissassembly process, observe the correct torques with a torque wrench for each bolt
- the castle nut goes on with ~40ft-lbs of torque, and replace the cotter pin
- put the wheel back on, and carefully snug the bolts (in opposite pairs) while moving the wheel slightly to be sure it is seated
- lower the car onto the ground
- tighten the lug nuts to 80ft-lbs each, tighening in opposite pairs
- tighten the spindle nut. the spindle nut goes on with 134ft-lbs of torque
- bend the rim of the spindle nut with a hammer and cold-rolled chisel or equivalent into the keyway, this locks the nut on for safety
- be sure not to over do this part, as it becomes really difficult to remove if you ever have to just a bit will suffice
- refill the transmission oil - this is a big one. Get it all in, as improper quantities can lead to damage and overheating of your transmission!
- replace the plastic wheel cover, and voila! You did it! Take your car for a test drive, then let it sit over night and make sure it holds the transmission oil
- if it does you are done!
There are some pitfalls to this job, listed below with some solutions which worked for me. Otherwise it really can be done in under an hour, once you have done it once.
...
...
...